Easy Jig Gen 2 Pilot Hole Bit Tight
If you're ready to build your first AR-15 from scratch, you'll first want to understand the concept of the 80% lower receiver. If you're already "in the know" and want to start building, the next step is figuring out the gunsmithing tools you'll be working with. The most important piece of this project is the tool that converts your receiver blank into a functional, stripped lower receiver (a firearm by definition). That critical component is the 80% lower jig, often called an "AR-15 jig".
The 80% Jig At a Glance
The 80% jig (pictured above is the Elite Builder jig for reference) is a portable gunsmithing station, often made of aluminum or steel (though sometimes polymer). The jig acts like a CNC machine in one respect, showing you where and how to cut the main cavity for the fire control group:

The jig also functions as a drilling template, showing you where to complete the holes required for installing the trigger, hammer, and safety selector lever pins in your AR-15's lower parts kit.
With these two operations completed, your 80% lower receiver becomes a stripped receiver ready for final assembly:
![]()
Typical Jig Parts & Functionality
Thankfully, the AR-15's lower receiver is governed by a sort of universal standard: No matter who manufactures one (80% lower or stripped), the finished receiver must have the same measurements and dimensions as all other receivers in that caliber. Otherwise, it won't work with the available parts kit, upper, and other assemblies you'll purchase to complete the assembly of your rifle or pistol. This is beneficial for us builders, because it means that all AR-15 jigs must contain generally the same parts that sport the same dimensions, too.
Importantly, that doesn't mean all jigs work the same way. 80% jigs are classified into two types: Drill press jigs and router jigs. Picking one of these two options will dictate whether you use a drill press/mill or router to cut the main cavity inside the receiver. Let's compare the two types and how their parts differ.
Drill Press Jig Parts
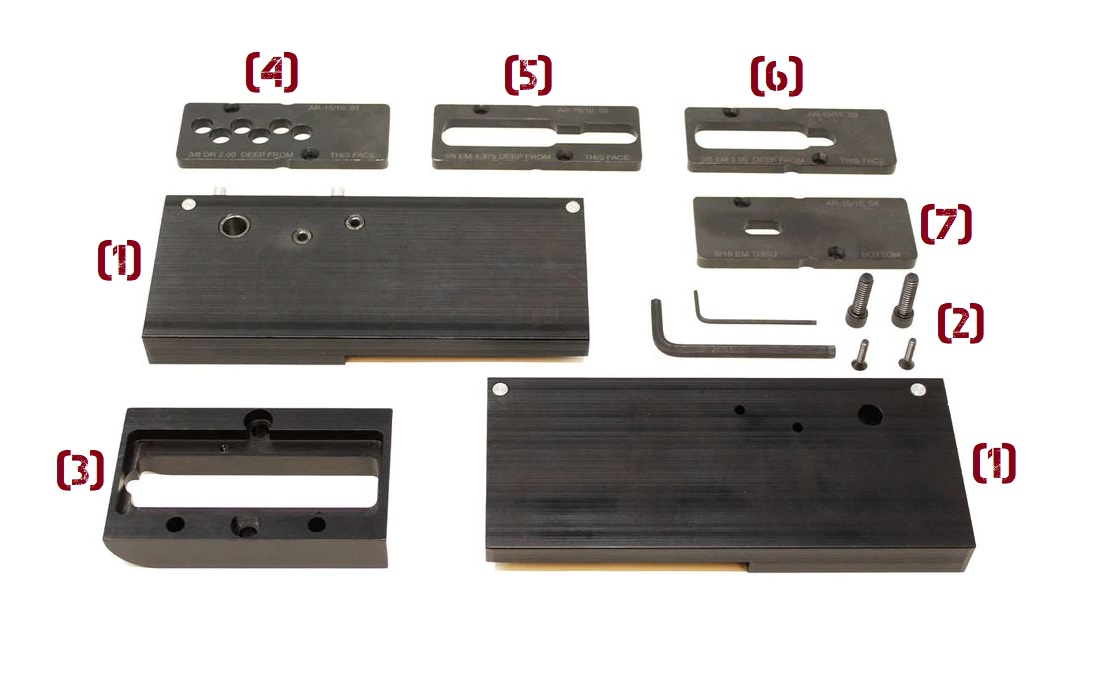
This deconstructed Elite Builder jig displays all the components required for setting up the 80% lower, cutting the fire control cavity, and drilling the necessary holes for the LPK (lower parts kit).
(#1): Jig Walls / Side Plates (Drilling Templates)
The jig walls are responsible for seating the receiver blank in place, and they allow for the installation of the nesting plate (#3) followed by the pilot hole and milling templates, which we'll cover shortly. You'll notice three holes drilled into each side plate. These are the guide holes for drilling the hammer, trigger, and safety pin holes. Drill bits are included and appropriately sized for each hole, so there's no measuring or guesswork involved.
(#2): Jig Wall Screws and Template Screws
Pretty simple: The two large screws are torqued to secure both side walls to the receiver. The provided Allen key is used to tighten each screw. The smaller screws are used for securing the numerous top plates for cutting the main cavity, also accompanied with an appropriate Allen key for torquing.
(#3): Nesting Plate / Template Support Plate
This is where drill press jigs and router jigs differ (we'll cover router jig plates next). The nesting plate is the base for holding all the top templates, plates #4, #5, and #6. The nesting plate "automatically indexes", or centers, the template plates in the right position relative to the receiver, so no measuring is required while securing them in place.
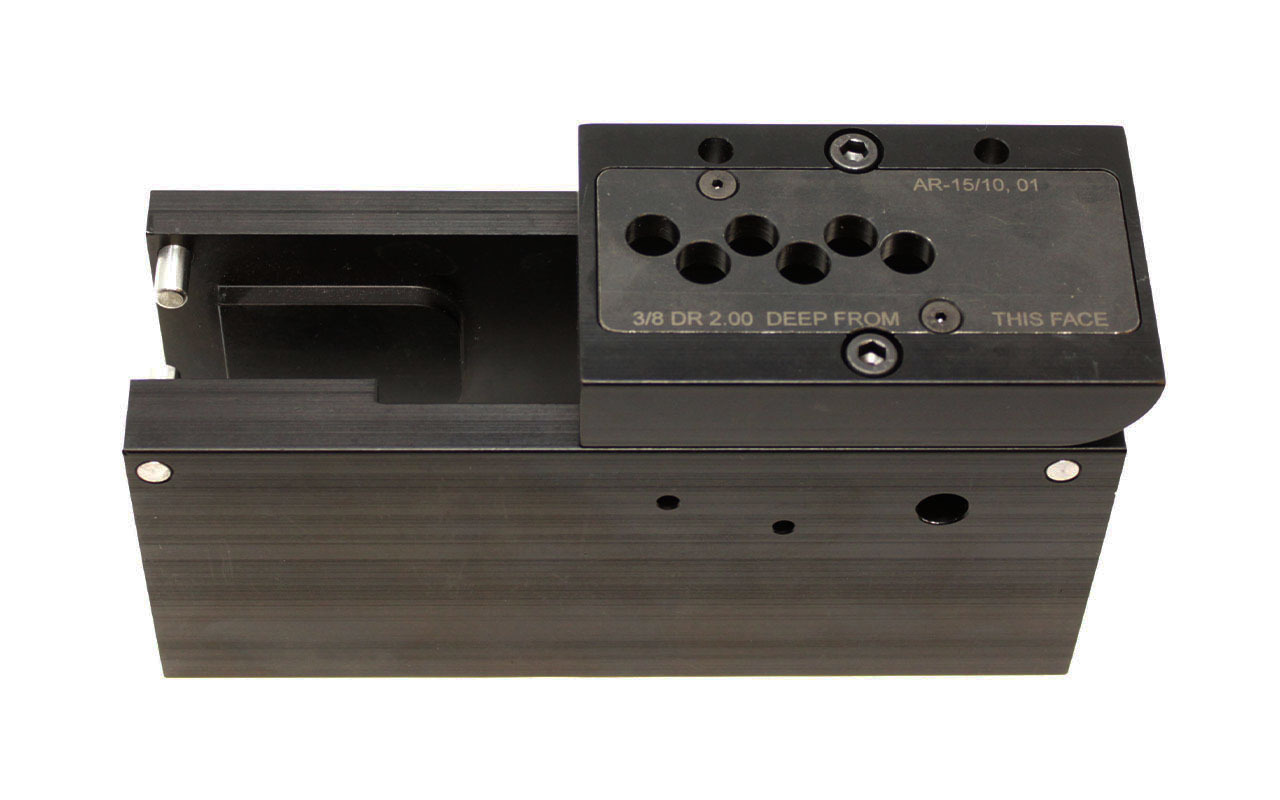
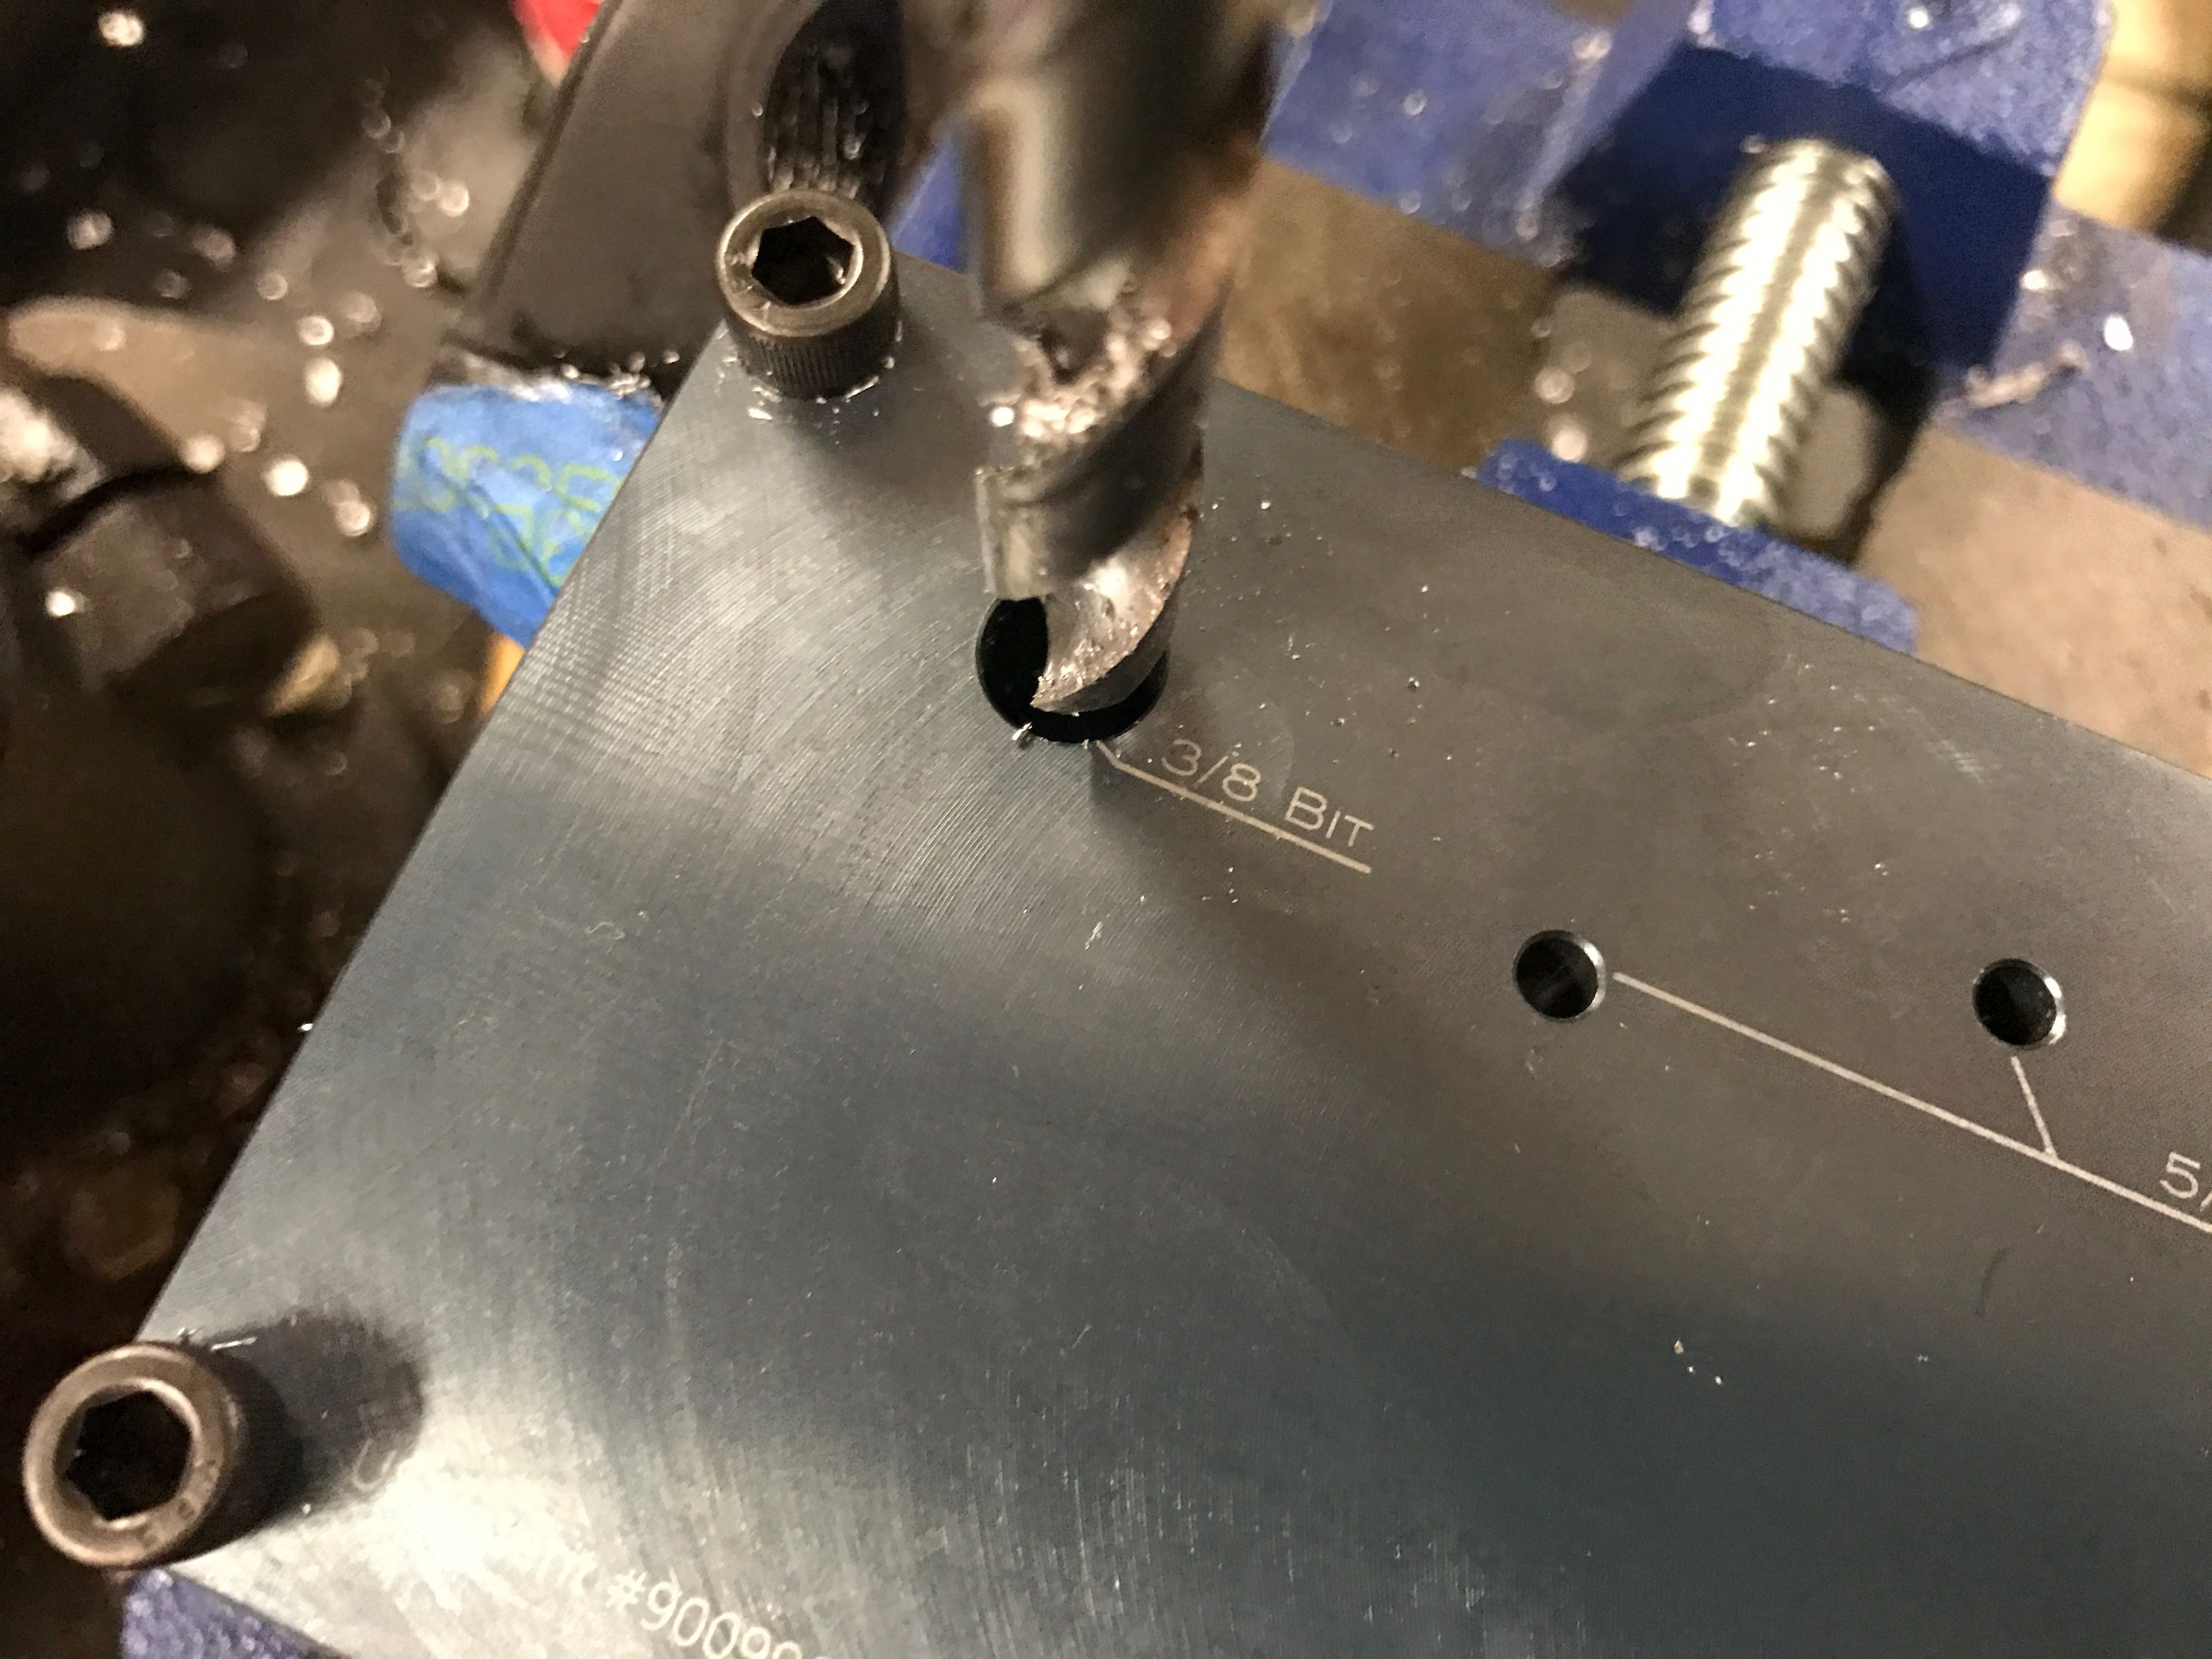
(#4): Fire Control Cavity Pilot Hole Template
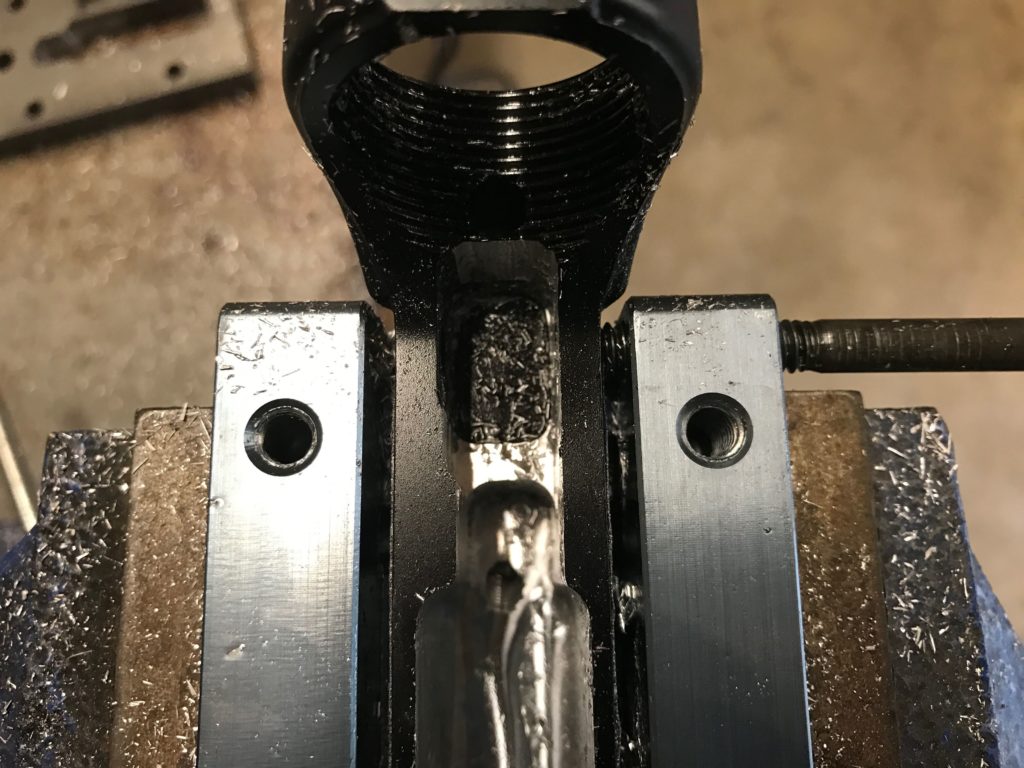
With the receiver secured between the jig walls and the nesting plate installed, the first plate to be installed atop the nesting plate is the pilot hole template. In order to begin removing the aluminum in the cavity for the LPK, the end mill bits used for cutting need a starting point. A single pilot hole may be drilled if you decide to use a milling machine (which allows for traditional cutting side to side). Though drilling numerous, large pilot holes removes a majority of the aluminum, leaving less material for the end mill bits to cut out to the final depth, as shown below:
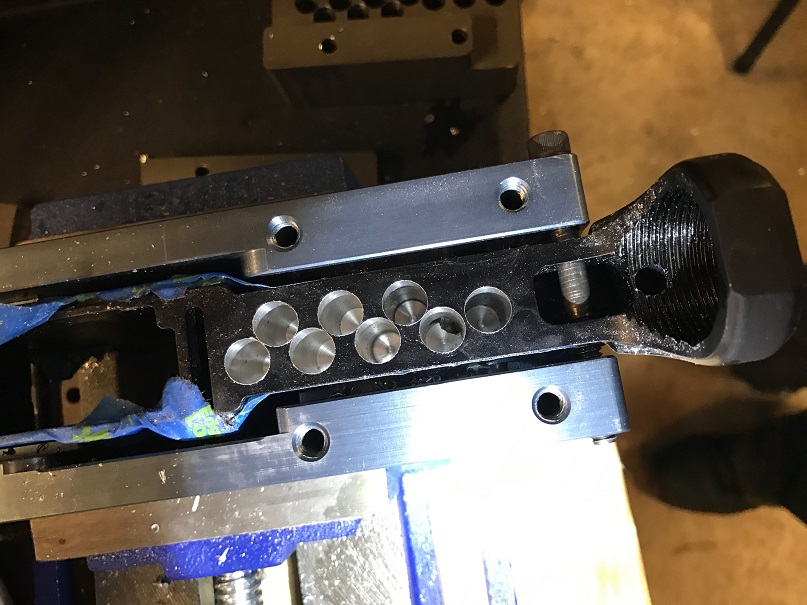
(#5): Main Cavity & Rear Shelf Milling Template
With a good bulk of aluminum removed from the fire control cavity, the remaining metal must be cut away using the end mill bits. This also means swapping out the pilot hole template for the first of three milling templates, plate #5. At this point in the process, if you were using a router jig, you'd be swapping out for something called a "router base plate" instead (which we'll also discuss in the next section).
The first template plate allows you to complete the rear shelf in your 80% lower (if it hasn't already been completed). The template provides the measured depth you must cut to before moving on to the next plate. Once finished, your main cavity and rear shelf should look similar to the example below:
(#6): Main Cavity & Rear Shelf Milling Template
The rest of the fire control cavity must be cut to a lower depth than the rear shelf. But to prevent accidentally cutting the rear shelf too much, another milling template is required, plate #6.
(#7): Trigger Pocket Template
Once the main cavity's milled entirely, all that remains is plate #7, the trigger pocket template plate. This template requires no depth -- you're simply punching out the exact shape in the template's cut-out to make room for your fun button. With the trigger pocket cut, one need only drill the required pin holes for the LPK.
Router Jig Parts
The router jig, another popular choice among 80% builders, ditches the use of a mill or drill press for cutting the main cavity. Of course, you will still need at least one of these two machines to drill the pinholes in your receiver. The router jig is set up similar to a drill/mill jig. It uses a design that requires the receiver to be clamped between two plates with templates atop it, made for cutting.
Jig Wall Side Plates
We get two side plates for securing our receiver blank, like a drill press/milling jig.
Router Milling Base Plate
The router base plate is what sets a router jig apart from a drill/mill jig. With the drill/mill jig, vertical cuts are made to start off the main cavity, and the depth of the drill bits and end mill bits is controlled with the mill or press itself. The drill press or milling machine is stabilized, and there is never any tool-on-tool contact.
That's not the case when cutting anything with a router (normally). The router must be contacting the top surface of the thing it's milling or cutting in order to remain stabilized and perfectly flat, lest you wind up with a jumpy, dangerous tool and poor cuts. But the AR-15 lower receiver requires extremely tight tolerances to perform so the router needs to be resting on something. Yet cutting metal can be difficult with a router, so friction cannot be introduced. The base plate and router adapter solve this problem.
The base plate interfaces with the router adapter plate via series of small glide bearings. The glide bearings run inside the pockets machined into the router base plate, acting as machining guides, while also preventing the router and attached bit from touching the jig itself.
Router Adapter Plate
The adapter plate has another bearing inside for allowing the bit attached to the router to rotate freely inside. The slits cut into the adapter plate are where the glide bearings get bolted in place.
Fire Control Cavity Templates
Just like the drill press jig, the end mill bit can't do all the work of cutting away the aluminum in the fire control cavity. So, a pilot hole template is provided, along with spacers and templates for completing the rear shelf and trigger pocket.
Drill Press vs. Router: Pros & Cons
So, which option's best? Both provide the results necessary for completing your lower receiver and ultimately building your AR-15. Each type of jig and tooling setup has its pros and cons:
Drill Press Pros
- Cuts can be carefully positioned
- No tool-on-tool contact or wear
- Greater control with tooling
- No need for spacer block
Drill Press Cons
- Cutting fire control cavity takes longer
- No lateral tool movement (unless using mill)
The drill press is the "slow, considered" method for completing an 80% lower. You get the opportunity to carefully set up each cut and hole to be drilled, though this requires more time. Because you have full control over the depth of your bits, there's no need to disassemble the jig to add or remove a spacer block (which could result in inaccurate cuts).
Router Pros
- Router cuts cavity quicker than press
Router Cons
- Bit must be controlled by hand
- Bit must be inserted while running
- Controlling the cut may be difficult
- Depth adjustments require loosening bit
- Spacer and jig disassembly may be required
The router jig is the "fast" method for completing an 80% lower: You can use the router and end mill bits much like a mill, making side-to-side cuts before increasing depth and repeating until complete. This is much faster than a drill press. Unfortunately, the router jig is typically less accurate and stable. The router and template plates may contact, causing wear and loss of tolerance. The end mill bit must also be inserted into each pilot hole while it's spinning, which can be dangerous. Controlling the side-to-side movement of the cutting bit is very important: Too much pressure, and the bit will flex or break. Too little pressure, and the tooling will chatter or produce a rough cut.
"Which Jig Type is Best For Me?"
For new builders who want the least amount of risk and the greatest accuracy/control, we recommend sticking with a drill press jig. Using a milling machine with a drill press jig is the best way to finish an 80% lower.
The position and depth of each cut for the fire control cavity can be carefully monitored and controlled with a press, and there is little risk when setting up each cut. There's no lowering the bit into the cavity by hand while it's spinning. You also don't need to loosen the bit and readjust its position once you begin cutting, like you do with a router. The only real drawback with a drill press jig is time (the only advantage gained with a router), though plunge cuts can be made relatively quickly once you're confident.
Even if using a router jig, you'll need a drill press to drill the holes for the lower parts kits' pins. Sticking with a drill press jig eliminates the need to buy another power tool. Lastly, drill press jigs can be used with a milling machine, providing the speed of a router cut with the precision of a vertical press.
IMPORTANT: End Mill Bits & Drill Press
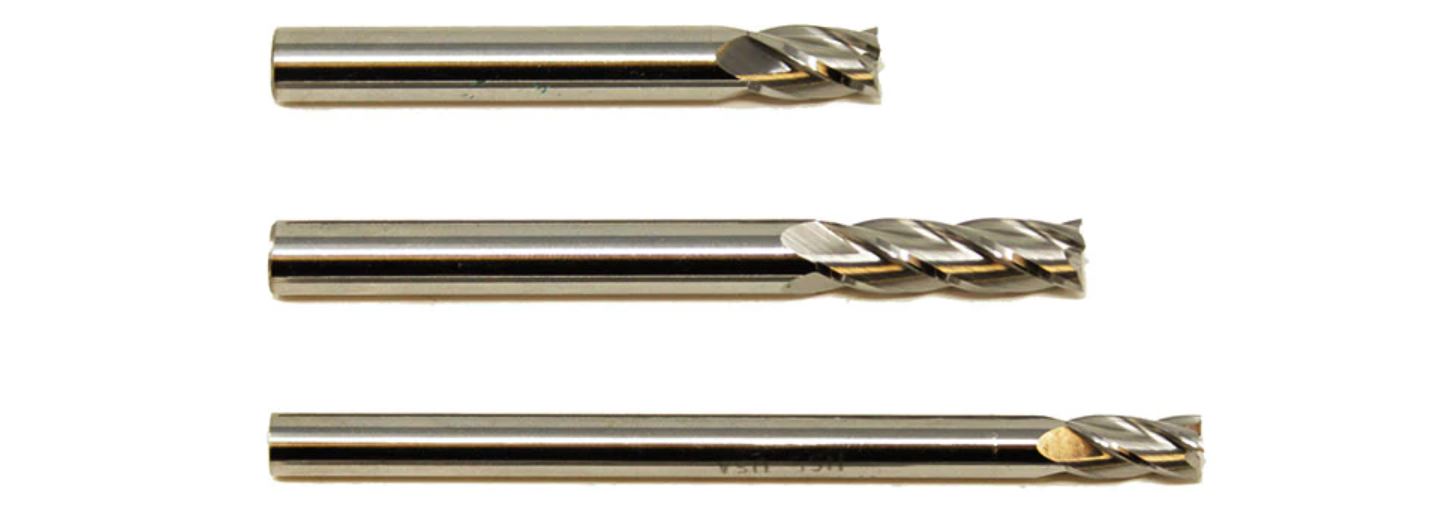
If you elect to use a drill press jig for your 80% lower, you'll need to ensure you're using center-cutting end mill bits.These end mill bits are already included with the jigs we sell (like the Elite Builder jig), though many builders choose to buy their own or invest in replacements at the local hardware store. Center-cutting bits are also called "slot drills" since they're designed to drill-cut vertically like a drill bit. Using a non-center cutting end mill to plunge-cut your receiver blank is dangerous, as it will likely shatter the bit. If you're buying your own end mill bits or not using the bits included with your drill press jig, reference the comparison below to ensure your bits are center-cut profile:
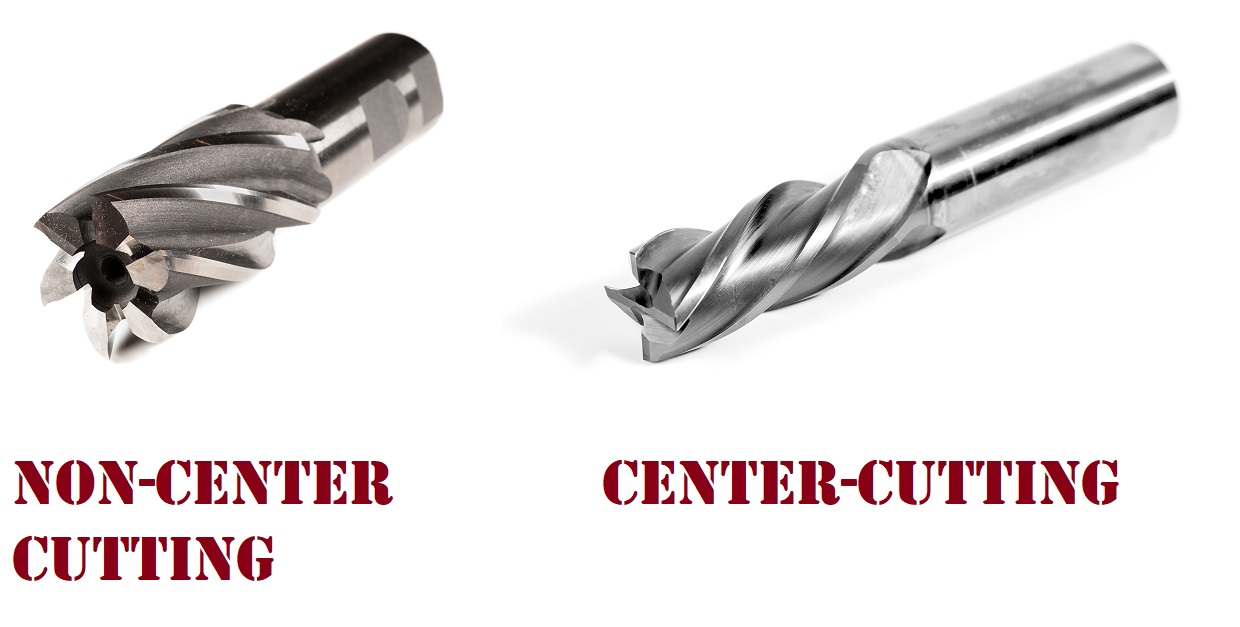
Center-cut end mills, or slot drills, have blades that come to a point or center at the tip of the bit. Non-center-cutting end mills typically have negative space in the form of a round hole at the center of the bit. This prevents the non-center-cutting bit from plunge-cutting vertically, because the material to be removed at the center of the bit is not able to be cut by the blades.
Summary & Helpful Guides
80% jigs are classified into to two types: Router jigs and drill press jigs. Drill press jigs are slower, but more stable and accurate. Router jigs provide faster cutting but sacrifice stability and accuracy. Both types of jigs require a drill press to complete the pin holes for the lower parts kit. If you're using a drill press, ensure you're using center-cutting end mill bits for the main cavity.
Helpful Guides
Completing your receiver blank is just the beginning! Check out our other guides below for mastering the AR-15 platform muzzle to buttstock, and learn what parts you need (and which are best) for your final assembly:
- All 80% Lowers & Frames Compared
- AR-15 Parts: The Builder's Master Guide
- How to Install the AR-15 Lower Parts Kit
DISCLAIMER: If you are new to the world of DIY gun building, you likely have a lot of questions and rightfully so. It's an area that has a lot of questions that, without the correct answers, could have some serious implications. At 80-lower.com, we are by no means providing this content on our website to serve as legal advice or legal counsel. We encourage each and every builder to perform their own research around their respective State laws as well as educating themselves on the Federal laws. When performing your own research, please be sure that you are getting your information from a reliable source.
Source: https://www.80-lower.com/80-lower-blog/builders-guide-to-80-jigs-drill-mill-vs-router/
0 Response to "Easy Jig Gen 2 Pilot Hole Bit Tight"
Post a Comment